Step-by-Step Guide to Using the "I” Weld Product
Summary: Welding mixes precision, strength, and skill. If you’re a beginner or an experienced welder looking for a new tool, the I Weld product is great for you. This guide shows you, step by step, how to use I Weld from setting up your equipment to making strong, long-lasting welds. It includes clear instructions and helpful tips, so you’ll quickly become an expert at using this innovative welding tool. S
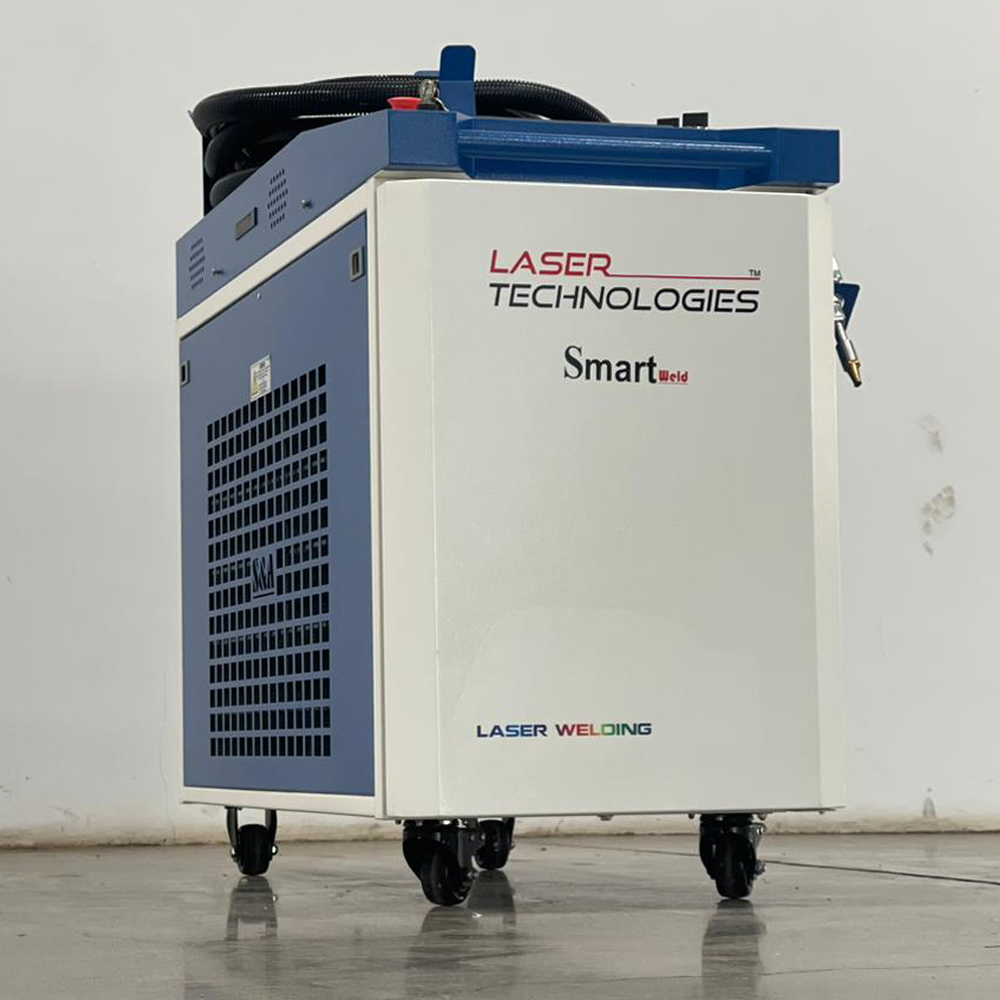
Welding mixes precision, strength, and skill. If you’re a beginner or an experienced welder looking for a new tool, the I Weld product is great for you. This guide shows you, step by step, how to use I Weld from setting up your equipment to making strong, long-lasting welds. It includes clear instructions and helpful tips, so you’ll quickly become an expert at using this innovative welding tool.
Step-by-Step Welding with I Weld
When it comes to welding, precision and preparation are key to achieving strong and durable results. Using the I Weld setup requires careful attention to detail, ensuring that each step is followed meticulously. Let's understand the process to help you maximize the efficiency and quality of your welding projects.
A. Preparing the Materials
1. Cleaning the Surface
Before you begin welding, it's crucial to prepare the metal surfaces you’ll be working with. This preparation ensures a clean and strong weld, free from imperfections that can compromise the strength and appearance of the final product.
- Remove Rust: Use a wire brush or sandpaper to eliminate rust. Rust can weaken the weld and cause inconsistencies.
- Strip Paint and Debris: Any paint or debris should be stripped away using a paint remover or a scraper. These substances can interfere with the welding process and lead to poor adhesion.
- Final Clean: Wipe down the surfaces with a clean, dry cloth to remove any residual dust or particles. This step is vital to ensuring a smooth welding process.
2. Positioning the Materials
Proper alignment and stabilization of the metal pieces are essential to achieving a precise and strong weld with I Weld product.
- Align the Pieces: Carefully position the metal pieces in the desired configuration. Make sure they are perfectly aligned to avoid any misalignment during the welding process.
- Use Clamps: Secure the aligned metal pieces with clamps. Clamps hold the pieces steady, preventing any movement that could cause errors in the weld.
B. Selecting the Appropriate Settings
Selecting the appropriate settings on the I Weld product is crucial for achieving optimal results in your welding projects. For that, we should have a good idea about the I Weld features.
1. Adjusting the Heat and Speed
Setting the correct heat and speed parameters on the I Weld machine is crucial for different types of metals and their respective thicknesses.
- Heat Settings: Adjust the heat according to the thickness and type of metal. Higher heat is generally required for thicker metals to ensure proper penetration and bonding.
- Speed Settings: Set the speed of the welding process based on the material's thickness and your own pace. The goal is to maintain a consistent speed that allows the weld to form correctly without gaps or overlaps.
2. Testing the Settings
Before committing to your actual project, it’s wise to test your settings on a piece of scrap metal.
- Perform a Test Weld: Use a scrap piece of metal similar to your project material to test the adjusted settings.
- Inspect the Test Weld: Check the test weld for any defects, such as undercutting or poor penetration, and adjust as needed.
C. Executing the Weld
1. Positioning the Welding Gun
- Hold at a 45-Degree Angle: The welding gun should be positioned at a 45-degree angle to the metal surface.
- Maintain Steady Distance: Keep the tip of the gun at a consistent distance from the metal, usually around half an inch.
2. Starting the Weld
- Press the Trigger: Once everything is set, press the trigger to initiate the welding process.
- Smooth Movement: Move the gun smoothly and consistently along the joint.
3. Completing the Weld
- Release the Trigger: When the weld is complete, gently release the trigger.
- Allow Natural Cooling: Let the welded area cool naturally to avoid cracks or weakened joints.
Post-Welding Procedures
After completing the welding process with the I Weld product, allow the welded material to cool down naturally, then inspect the weld before any further procedures.
Inspecting the Weld
- Visual Inspection: Check the weld for defects or irregularities.
- Strength Test: Apply pressure to the welded area to test its integrity.
Cleaning Up
- Removing Slag: Use a chipping hammer to remove any slag.
- Polishing the Weld: Use a wire brush to clean and polish the weld.
I Weld Maintenance
Proper maintenance of the I Weld is crucial for ensuring both safety and performance.
A. Routine Checks
1. Cleaning the Nozzle
Regularly remove spatter from the nozzle to maintain gas flow and weld quality.
2. Checking the Cables
Inspect power and ground cables for cracks or exposed wires to prevent electrical issues.
B. Storage Tips
1. Safe Storage
Store your I Weld in a cool, dry place to protect components from moisture-related damage.
2. Covering the Device
Use a cover to protect the I Weld from dust and debris and keep it in good condition.
C. Troubleshooting Common Issues
1. Overheating
If the unit overheats, stop work and let it cool naturally before resuming.
2. Poor Weld Quality
Correct settings and thorough surface cleaning help avoid subpar welds and rework.
Features of I Weld Product
I Weld is designed for both professional and hobbyist use, with a user-friendly interface and robust functionality.
- Adjustable Settings: Fine-tune heat and speed for metals of varying thicknesses.
- Safety Mechanisms: Built-in safeguards like automatic shutoff on overheating or power surge.
- Lightweight Design: Easy to handle, reducing fatigue during extended use.
- Digital Display: Clearly shows settings and status for real-time adjustments.
Conclusion
By properly storing and maintaining your I Weld, you can prolong its lifespan and continue to produce high-quality welds. Following safety precautions and guidelines is essential for optimal results.
Experience the difference with Laser Technologies I Weld, designed to provide precision and efficiency in your welding projects. Using the I Weld product can significantly enhance your welding projects, providing both efficiency and quality.
FAQs
1. How often should I maintain my I Weld device?
Routine maintenance should be performed after every few uses, including cleaning the nozzle, checking cables, and inspecting connections.
2. Can I Weld be used on all types of metals?
I Weld can work with a wide range of metals, including steel, aluminum, and stainless steel, with appropriate settings and accessories.
3. What safety gear is necessary when using I Weld?
Always wear protective clothing, heat-resistant gloves, and a welding helmet with the proper shade lens, and ensure good ventilation.
4. How do I know if my weld is strong enough?
Check bead appearance and penetration, then apply physical stress to the joint. For critical applications, use non-destructive testing methods.
5. What should I do if my I Weld overheats?
Stop using the device, let it cool naturally, then verify you are within recommended usage limits before continuing.
Tags: Automation, Buying guide, Welding, Maintenance